In Part 1 I talked about using iBeacons to improve presence tracking. In part 2 I’ll talk about how to track things like keys that can’t track themselves by using iBeacons.
Tracking things using iBeacons
In the first part I mentioned that iBeacons just send out I’m here packets, and we used this to trigger an update when your phone came close to a fixed beacon.
But beacons don’t have to be fixed.
Your phone knows roughly where it is located (based on mobile phone masts, Wi-Fi networks or GPS). If your phone sees an I’m here message then it knows the beacon is close.
If your phone can remember (or tell a server) where it was when it last saw the iBeacon - then it knows where the beacon was. So the result of this is that you can track where an iBeacon was - even though the iBeacon doesn’t have any tracking technology itself.
So if you put an iBeacon on your keys or in your car - then you can track them.
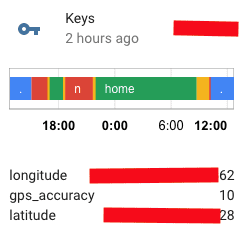
![]() Here are my keys - with a Estimote Nearable iBeacon stuck to them. Ugly but effective!
Here are my keys - with a Estimote Nearable iBeacon stuck to them. Ugly but effective!
It’s easier to set up OwnTracks and HA to track a mobile beacon than the fixed beacon I discussed in Part 1, because you only need to tell OwnTracks about your iBeacon. You don’t need to configure HA at all.
OwnTracks currently only supports mobile beacons on iOS.
You set up the beacon the same way as we discussed in part 1. The only difference is that instead of calling the region the name of a location (eg -drive) you call it the name of the device you want to track (eg -keys). Remember the leading ‘-’ that makes the connection more reliable.
![]()
Once you’ve added the iBeacon - you should be able to see it on the OwnTracks region screen. If your phone can see the packets from that beacon, OwnTracks will turn the relevant Region red.
Because you turned Share on for the region, when OwnTracks sees the beacon it will send HA a message. HA will use this message to add the beacon as a tracked device if it hasn’t seen it before. So you should see a new device appear in HA called device_tracker.beacon_[name] - and its location will be where your phone thought it was when it last saw the beacon.
If your phone moves and sends HA a new location while it is still in range of the beacon - HA will update the location of the beacon. So if go for a drive in your car - you will see both your phone and the device_tracker.beacon_car move together.
If you park your car and go shopping - device_tracker.beacon_car will stop moving.
With the basic tracking working - you can use automation to do things like open your gates if your car comes home
automation:
    - alias: 'Open gate'
      trigger:
        - platform: state
          entity_id: device_tracker.beacon_car
          from: 'not_home'
          to: 'home'
      condition:
        - condition: state
          entity_id: switch.gate
          state: 'off'
      action:
          service: switch.turn_on
          entity_id: switch.gate
Or warn you if you leave your keys behind
automation:
  - alias: 'Forgotten keys'
    trigger:
      platform: template
      value_template: '{{states.device_tracker.greg_gregphone.state != states.device_tracker.beacon_keys.state}}'
    condition:
      condition: template
      value_template: '{{ states.device_tracker.greg_gregphone.state != "home" }}'
    action:
      service: script.turn_on
      entity_id: script.send_key_alert

  - alias: 'Forgotten keys - cancel'
    trigger:
      platform: template
      value_template: '{{states.device_tracker.greg_gregphone.state == states.device_tracker.beacon_keys.state}}'
    condition:
      - condition: state
        entity_id: script.send_key_alert
        state: 'on'
    action:
      service: script.turn_off
      entity_id: script.send_key_alert
script:
  send_key_alert:
    sequence:
      - delay:
          minutes: 2
      - service: notify.notify
        data:
            message: 'You forgot your keys'
            target: 'device/gregs_iphone'
(The delay is needed for two reasons: -
1. HA updates the beacon and phone locations at slightly different times - so you don’t want the automation to trigger in the gap between the updates
2. I’ve found that beacons (especially the low power Estimote Nearables) can get disconnected for a few seconds so it’s best to wait a minute or so before deciding that you’ve left your keys behind)
Using both types of iBeacons at the same time
Of course you can use both fixed and mobile beacons at the same time. I want my gates to open when I arrive home in the car - so I use an iBeacon in the car so that I can track the car, and a iBeacon on my drive so that a location update is triggered when I arrive. I’ve been experimenting with a high power beacon in a waterproof box on my drive which seems to work well to notice when I get home.
![]()
Long range / High power beacon
![]()
Waterproof beacon
Buying Beacons
This isn’t a buyer’s guide, but I just wanted to mention the iBeacons I’ve been using. I think you should be able to use any iBeacon with HA and OwnTracks. You generally can’t buy beacons in your local electronics shop - so I just wanted to briefly mention the two suppliers I’ve used so far.
I’ve bought quite a few iBeacons from a company called Blue Sense Networks. I work in the tech startup sector in the UK so I partly chose them because they are a local start-up who seemed worth supporting. The products, support and software all seem good. I use a number of their beacons - from a simple USB dongle, to a long range beacon. All their products have batteries that can be changed (or no batteries in the case of the externally powered USB device) - and you can configure all the parameters you’d want to using their software. I had one software issue, support got back to me at a weekend(!) - and the issue was resolved with a software release two days later.
All the beacons seem fine - and the long range unit does work over a longer range than my other beacons.
I bought some other beacons from a US/Polish startup called Estimote, who I think are better known. I bought a developer pack of 10 of their nearables which as well as being iBeacons also send out other data (orientation and motion) using their own protocol. This is interesting if you’re developing your own application, but for OwnTracks and HA they are just regular beacons. They are small and self adhesive - so you can stick them to things (like your keys). You can’t change all the parameters on these devices (UUID/Major/Minor are fixed) - and the batteries can’t be replaced. I also killed one of the estimote beacons (I assume the battery died) after I carried it around for a few months and dropped it many times! On the other hand they are well priced, small and waterproof!
I’ve mainly used these as devices to track rather that location beacons. Estimote also sell some slightly larger iBeacons with replaceable batteries. Estimote support responded quickly and were helpful when I couldn’t work out how to edit their beacon’s parameters (although the answer was you can’t yet).
The larger Blue Sense Network beacons seem to be better at maintaining a connection that the Estimotes - although that might be because I’m reluctant to turn the power to maximum and reduce the gap between sending packets on the Estimotes where I can’t replace the batteries!
Conclusion
As I said in part 1, I’ve found iBeacons to be a good way of improving presence detection. I also used them to track devices like my car and my keys that can’t track themselves.
I’m still experimenting, so I hope I can do more with iBeacons. I hope I’ve encouraged you do so the same. If you do please share your experiences.
Notes
Please see the notes at the end of Part 1 for documentation information.
]]>