For this tutorial, I’ll walk through how to get going with ESP8266, get the temperature and humidity and report it to MQTT where Home Asssistant can pick it up.
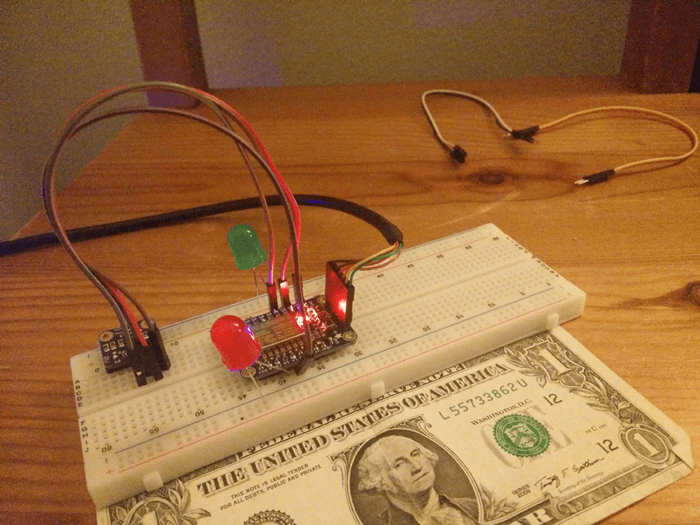 Picture of the final setup (+ 2 LED for decoration)
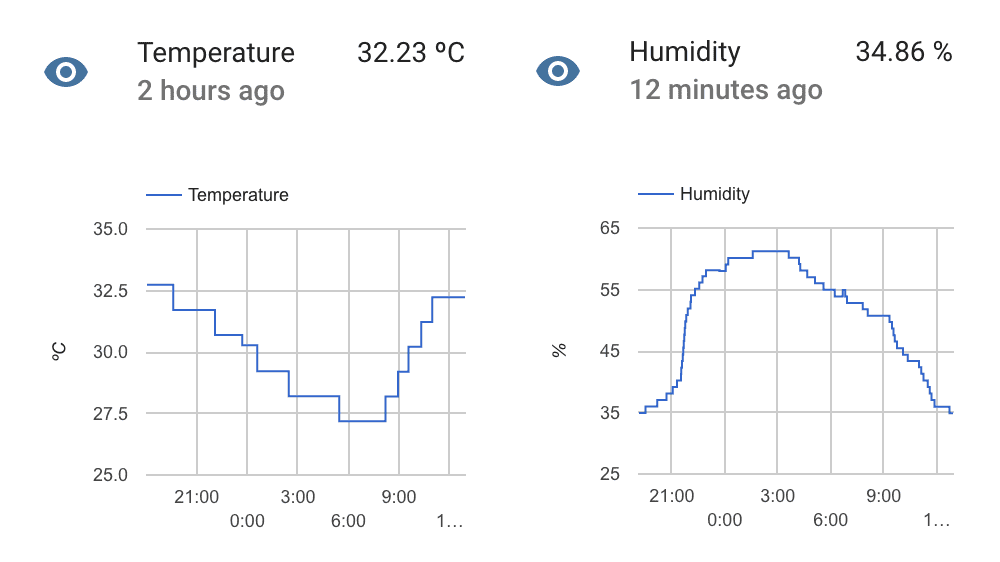 Home Assistant will keep track of historical values and allow you to integrate it into automation.
Components
I’ve been using Adafruit for my shopping:
- Adafruit HUZZAH ESP8266 Breakout (assembly instructions)
- Adafruit HDC1008 Temperature & Humidity Sensor Breakout Board (assembly instructions)
- MQTT server
Besides this, you will need the usual hardware prototype equipment: a breadboard, some wires, soldering iron + wire, Serial USB cable.
Alternatives
Since this article has been published the HDC1008 has been discontinued. Updated sketches are available for the following alternatives:
Connections
On your breadboard, make the following connections from your ESP8266 to the HDC1008:
| ESP8266 | HDC1008 |
|---|---|
| GND | GND |
| 3V | Vin |
| 14 | SCL |
| #2 | SDA |
I picked #2 and 14 myself, you can configure them in the sketch.
Preparing your IDE
Follow these instructions on how to install and prepare the Arduino IDE for ESP8266 development.
After you’re done installing, open the Arduino IDE, in the menu click on sketch -> include library -> manage libraries and install the following libraries:
- PubSubClient by Nick ‘O Leary
- Adafruit HDC1000
Sketch
If you have followed the previous steps, you’re all set.
- Open Arduino IDE and create a new sketch (
File->New) - Copy and paste the below sketch to the Arduino IDE
- Adjust the values line 6 - 14 to match your setup
- Optional: If you want to connect to an MQTT server without a username or password, adjust line 63.
- To have the ESP8266 accept our new sketch, we have to put it in upload mode. On the ESP8266 device keep the GPIO0 button pressed while pressing the reset button. The red led will glow half bright to indicate it is in upload mode.
- Press the upload button in Arduino IDE
- Open the serial monitor (
Tools->Serial Monitor) to see the output from your device
This sketch will connect to your WiFi network and MQTT broker. It will read the temperature and humidity from the sensor every second. It will report it to the MQTT server if the difference is > 1 since last reported value. Reports to the MQTT broker are sent with retain set to True. This means that anyone connecting to the MQTT topic will automatically be notified of the last reported value.
1 2 3 4 5 6 7 8 9 10 11 12 13 14 15 16 17 18 19 20 21 22 23 24 25 26 27 28 29 30 31 32 33 34 35 36 37 38 39 40 41 42 43 44 45 46 47 48 49 50 51 52 53 54 55 56 57 58 59 60 61 62 63 64 65 66 67 68 69 70 71 72 73 74 75 76 77 78 79 80 81 82 83 84 85 86 87 88 89 90 91 92 93 94 95 96 97 98 99 100 101 102 103 104 105 106 107 108 109 110 111 |
#include <ESP8266WiFi.h> #include <Wire.h> #include <PubSubClient.h> #include <Adafruit_HDC1000.h> #define wifi_ssid "YOUR WIFI SSID" #define wifi_password "WIFI PASSWORD" #define mqtt_server "YOUR_MQTT_SERVER_HOST" #define mqtt_user "your_username" #define mqtt_password "your_password" #define humidity_topic "sensor/humidity" #define temperature_topic "sensor/temperature" WiFiClient espClient; PubSubClient client(espClient); Adafruit_HDC1000 hdc = Adafruit_HDC1000(); void setup() { Serial.begin(115200); setup_wifi(); client.setServer(mqtt_server, 1883); // Set SDA and SDL ports Wire.begin(2, 14); // Start sensor if (!hdc.begin()) { Serial.println("Couldn't find sensor!"); while (1); } } void setup_wifi() { delay(10); // We start by connecting to a WiFi network Serial.println(); Serial.print("Connecting to "); Serial.println(wifi_ssid); WiFi.begin(wifi_ssid, wifi_password); while (WiFi.status() != WL_CONNECTED) { delay(500); Serial.print("."); } Serial.println(""); Serial.println("WiFi connected"); Serial.println("IP address: "); Serial.println(WiFi.localIP()); } void reconnect() { // Loop until we're reconnected while (!client.connected()) { Serial.print("Attempting MQTT connection..."); // Attempt to connect // If you do not want to use a username and password, change next line to // if (client.connect("ESP8266Client")) { if (client.connect("ESP8266Client", mqtt_user, mqtt_password)) { Serial.println("connected"); } else { Serial.print("failed, rc="); Serial.print(client.state()); Serial.println(" try again in 5 seconds"); // Wait 5 seconds before retrying delay(5000); } } } bool checkBound(float newValue, float prevValue, float maxDiff) { return !isnan(newValue) && (newValue < prevValue - maxDiff || newValue > prevValue + maxDiff); } long lastMsg = 0; float temp = 0.0; float hum = 0.0; float diff = 1.0; void loop() { if (!client.connected()) { reconnect(); } client.loop(); long now = millis(); if (now - lastMsg > 1000) { lastMsg = now; float newTemp = hdc.readTemperature(); float newHum = hdc.readHumidity(); if (checkBound(newTemp, temp, diff)) { temp = newTemp; Serial.print("New temperature:"); Serial.println(String(temp).c_str()); client.publish(temperature_topic, String(temp).c_str(), true); } if (checkBound(newHum, hum, diff)) { hum = newHum; Serial.print("New humidity:"); Serial.println(String(hum).c_str()); client.publish(humidity_topic, String(hum).c_str(), true); } } } |
Configuring Home Assistant
The last step is to integrate the sensor values into Home Assistant. This can be done by setting up Home Assistant to connect to the MQTT broker and subscribe to the sensor topics.
1 2 3 4 5 6 7 8 9 10 11 12 13 14 15 16 17 18 |
mqtt: broker: YOUR_MQTT_SERVER_HOST username: your_username password: your_password sensor: platform: mqtt name: "Temperature" state_topic: "sensor/temperature" qos: 0 unit_of_measurement: "ºC" sensor 2: platform: mqtt name: "Humidity" state_topic: "sensor/humidity" qos: 0 unit_of_measurement: "%" |