 MQTT support was added to Home Assistant recently. The MQTT component will enable you to do all sort of things. Most likely you will use it to communicate with your devices. But Home Assistant doesn’t care where the data is coming from or is limited to real hardware as long as there is MQTT support. This means that it doesn’t matter if the data is coming from a human, a web service, or a device.
A great example is shown in a Laundry Automation post in this blog.
This post will give you a small overview of some other possibilities on how to use MQTT with Home Assistant.
Manual usage
The simplest but not the coolest way as a human to interact with a Home Assistant sensor is launching a command manually. Let’s create a “Mood” sensor. For simplicity Home Assistant and the MQTT broker are both running on the same host. The needed configuration snipplets to add to the configuration.yaml file consists of two parts: one for the broker and one for the sensor.
1
2
3
4
5
6
7
|
mqtt:
broker: 127.0.0.1
sensor:
- platform: mqtt
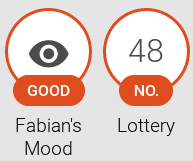
name: "Fabian's Mood"
state_topic: "home-assistant/fabian/mood"
|
After a restart of Home Assistant the “Mood” sensor will show up in the frontend. For more details about the configuration of MQTT itself and the sensor, please refer to the MQTT component or the MQTT sensor documentation.
Now we can set the mood. The commandline tool (mosquitto_pub) which is shipped with mosquitto is used to send an MQTT message.
1
|
$ mosquitto_pub -h 127.0.0.1 -t "home-assistant/fabian/mood" -m "bad"
|
 The Mood sensor
This is a really bad example. Don’t do this in the real world because you won’t be able to create diagrams of historical data. Better use a numerical value.
Python MQTT bindings
The last section was pretty boring, I know. Nobody wants to send MQTT messages by hand if there is a computer on the desk. If you are playing the lottery this section is for you. If not, read it anyway because the lottery is just an example :-).
This example is using the Paho MQTT Python binding because those binding should be available on the host where Home Assistant is running. If you want to use this example on another machine, please make sure that the bindings are installed (pip3 install paho-mqtt).
The first step is to add an additional MQTT sensor to the configuration.yaml file. The sensor will be called “Lottery” and the unit of measurement will be “No.”.
1
2
3
4
|
- platform: mqtt
name: "Lottery"
state_topic: "home-assistant/lottery/number"
unit_of_measurement: "No."
|
Don’t forget to restart Home Assistant to make the configuration active.
To play, we need numbers from 1 to 49 which can be marked on the ticket. Those numbers should be random and displayed in the Home Assistant frontend. The Python script below is another simple example on how to send MQTT messages from the commandline; this time in a loop. For further information and examples please check the Paho MQTT documentation.
1
2
3
4
5
6
7
8
9
10
11
12
13
14
15
16
17
18
19
20
21
22
|
import time
import random
import paho.mqtt.client as mqtt
import paho.mqtt.publish as publish
broker = '127.0.0.1'
state_topic = 'home-assistant/lottery/number'
delay = 5
publish.single('home-assistant/fabian/mood', 'good', hostname=broker)
client = mqtt.Client("ha-client")
client.connect(broker)
client.loop_start()
while True:
client.publish(state_topic, random.randrange(0, 50, 1))
time.sleep(delay)
|
Every 5 seconds a message with a new number is sent to the broker and picked up by Home Assistant. By the way, my mood is much better now.
 The Lottery sensor
With only a few lines of Python and an MQTT broker you can create your own “smartdevice” or send information to Home Assistant which you haven’t think of. Of course this is not limited to Python. If there is an MQTT library available, the device can be used with Home Assistant now.
Arduino
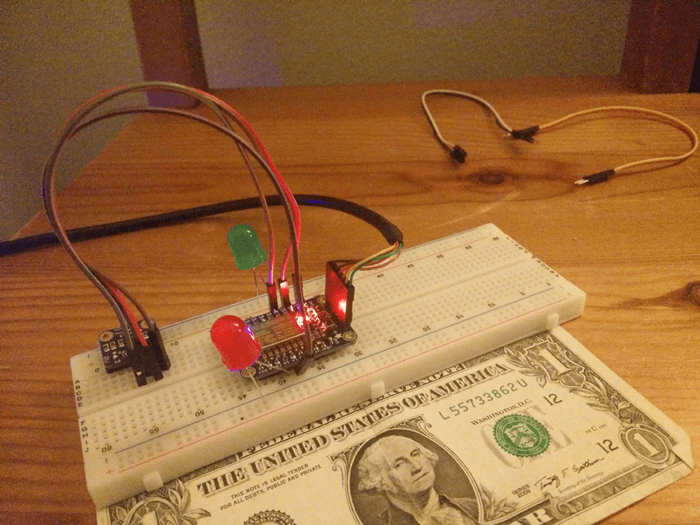
To get started with real hardware that is capable to send MQTT messages, the Arduino platform is an inexpensive way to do it. In this section an Arduino UNO with an Ethernet shield and a photo resistor is used. The photo resistor is connected to analog pin 0 (A0) and has an output from 0 to 1024.
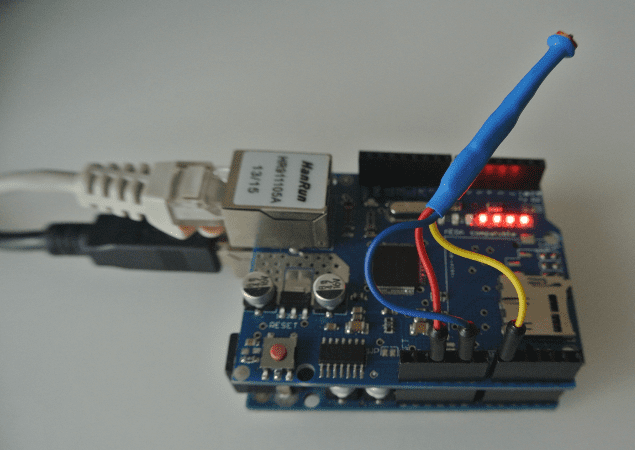 The Arduino UNO with Ethernet shield and photo resistor
The MQTT client for the Arduino needs to be available in your Arduino IDE. Below you will find a sketch which could act as a starting point. Please modify the IP addresses, the MAC address, and the pin as needed and upload the sketch to your Arduino.
1
2
3
4
5
6
7
8
9
10
11
12
13
14
15
16
17
18
19
20
21
22
23
24
25
26
27
28
29
30
31
32
33
34
35
36
37
38
39
40
41
42
43
44
45
46
47
48
49
50
51
52
53
54
55
56
57
58
59
60
61
62
63
64
65
66
67
68
|
#include <SPI.h>
#include <Ethernet.h>
#include <PubSubClient.h>
#define DEBUG 1
IPAddress deviceIp(192, 168, 0, 43);
byte deviceMac[] = { 0xAB, 0xCD, 0xFE, 0xFE, 0xFE, 0xFE };
char* deviceId = "sensor01";
char* stateTopic = "home-assistant/sensor01/brightness";
int sensorPin = A0;
char buf[4];
int updateInterval = 1000;
IPAddress mqttServer(192, 168, 0, 12);
int mqttPort = 1883;
EthernetClient ethClient;
PubSubClient client(ethClient);
void reconnect() {
while (!client.connected()) {
#if DEBUG
Serial.print("Attempting MQTT connection...");
#endif
if (client.connect(deviceId)) {
#if DEBUG
Serial.println("connected");
#endif
} else {
#if DEBUG
Serial.print("failed, rc=");
Serial.print(client.state());
Serial.println(" try again in 5 seconds");
#endif
delay(5000);
}
}
}
void setup() {
Serial.begin(57600);
client.setServer(mqttServer, mqttPort);
Ethernet.begin(deviceMac, deviceIp);
delay(1500);
}
void loop() {
if (!client.connected()) {
reconnect();
}
client.loop();
int sensorValue = analogRead(sensorPin);
#if DEBUG
Serial.print("Sensor value: ");
Serial.println(sensorValue);
#endif
client.publish(stateTopic, itoa(sensorValue, buf, 10));
delay(updateInterval);
}
|
The Arduino will send the value of the sensor every second. To use the data in Home Assistant, add an additional MQTT sensor to the configuration.yaml file.
1
2
3
4
|
  - platform: mqtt
    name: "Brightness"
    state_topic: "home-assistant/sensor01/brightness"
    unit_of_measurement: "cd"
|
After a restart of Home Assistant the values of your Arduino will be available.
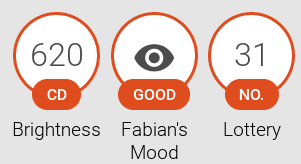 The Brightness sensor
I hope that this post could give you some ideas about the usage Home Assistant and MQTT. If you are working on a cool project that includes Home Assistant, please let us now.
]]>
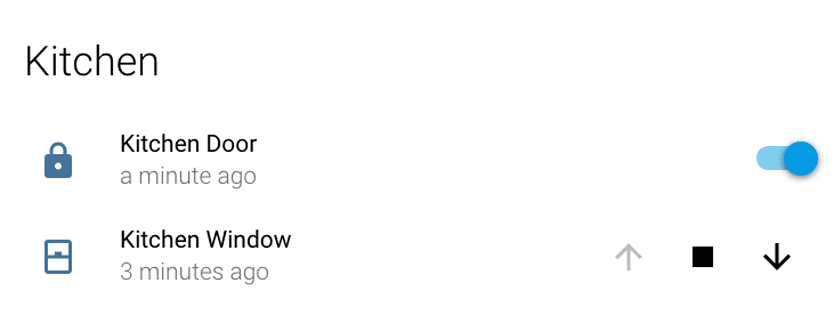
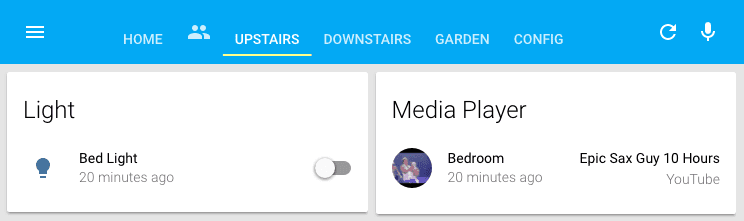 Example of the new views in the frontend. Learn more.


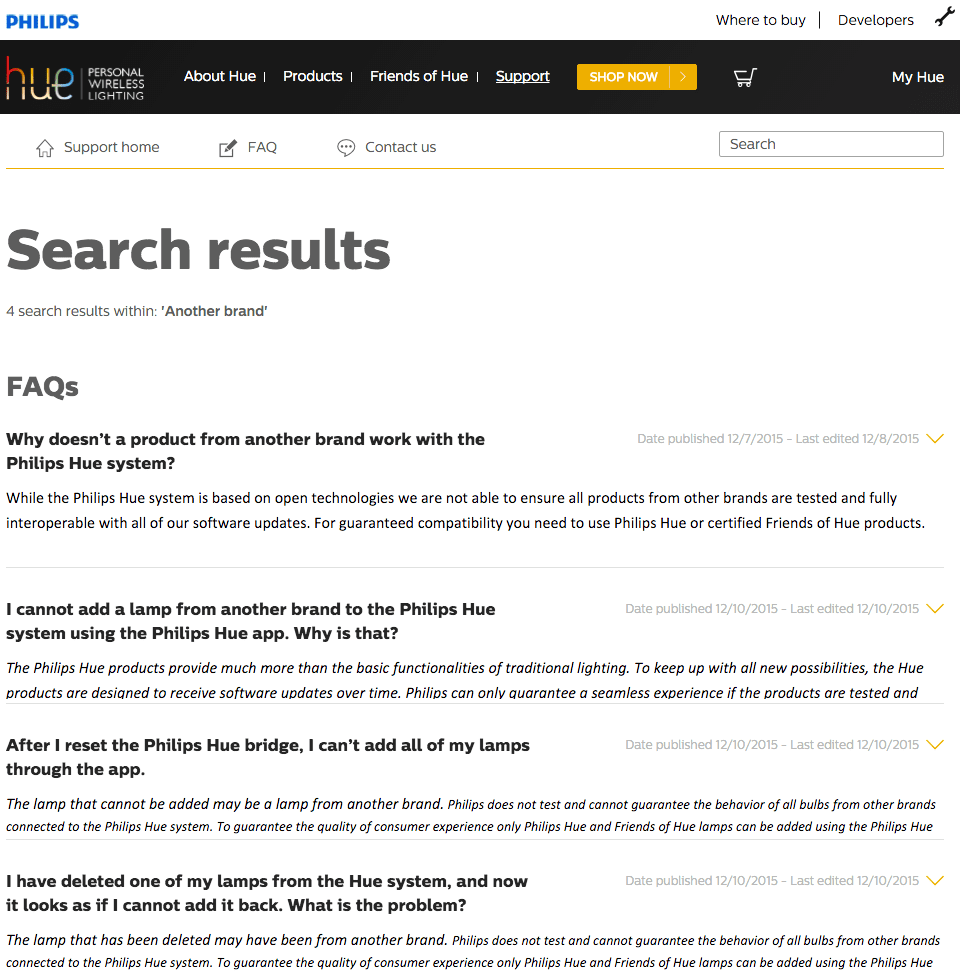
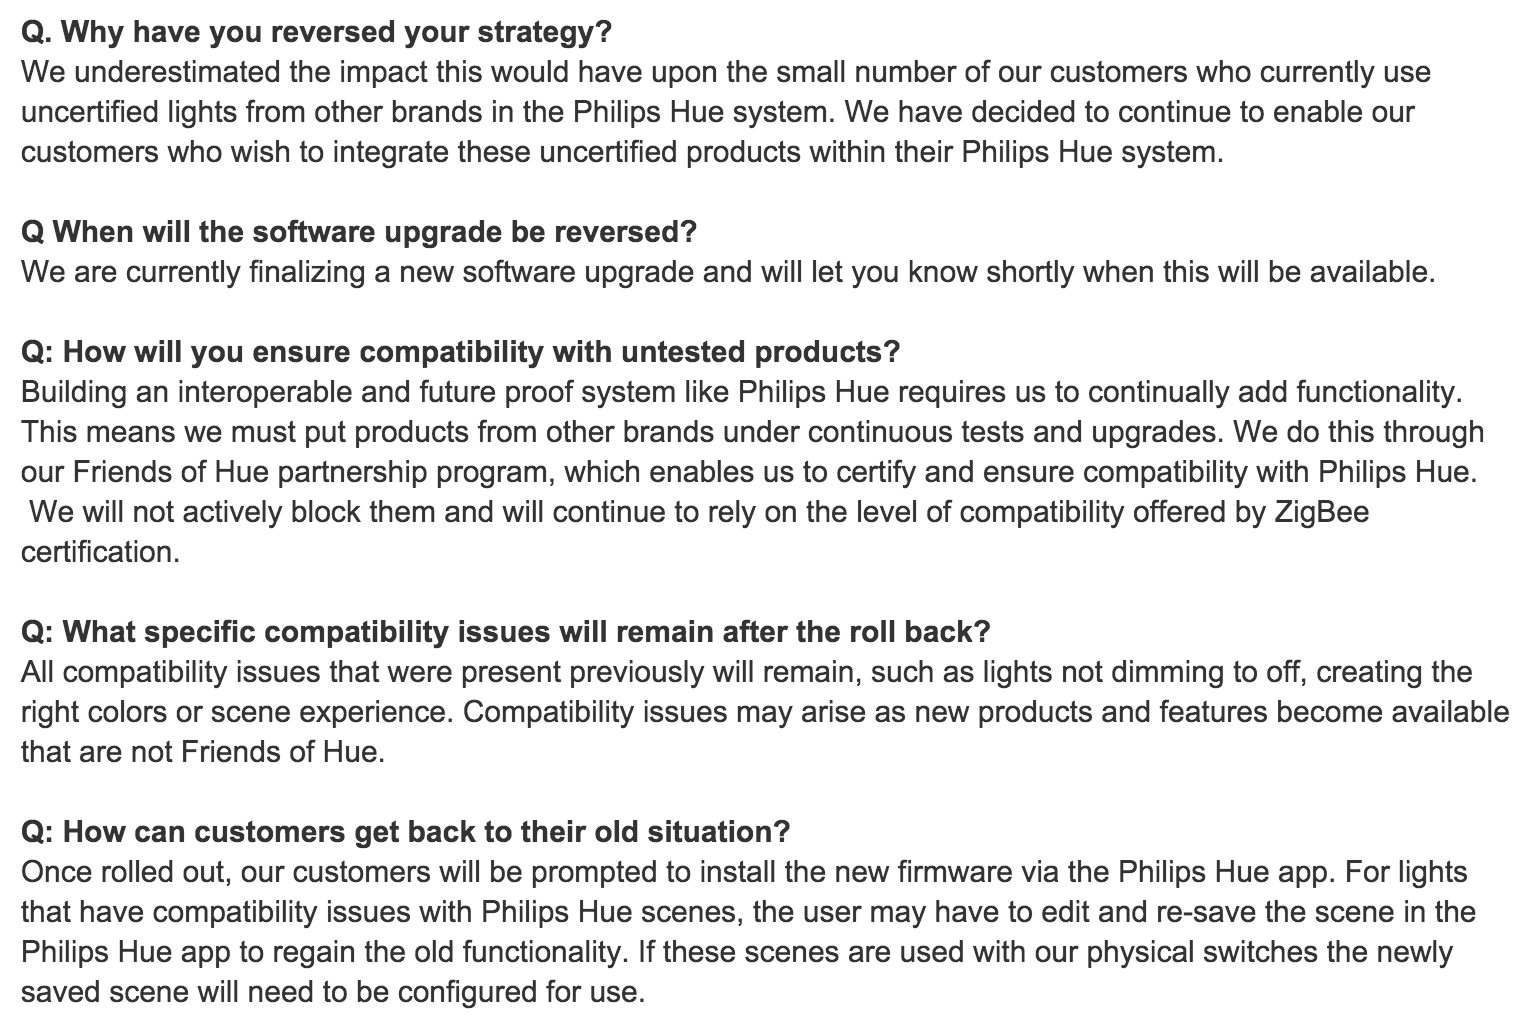 Philips Hue FAQ entries regarding reversing the decision.
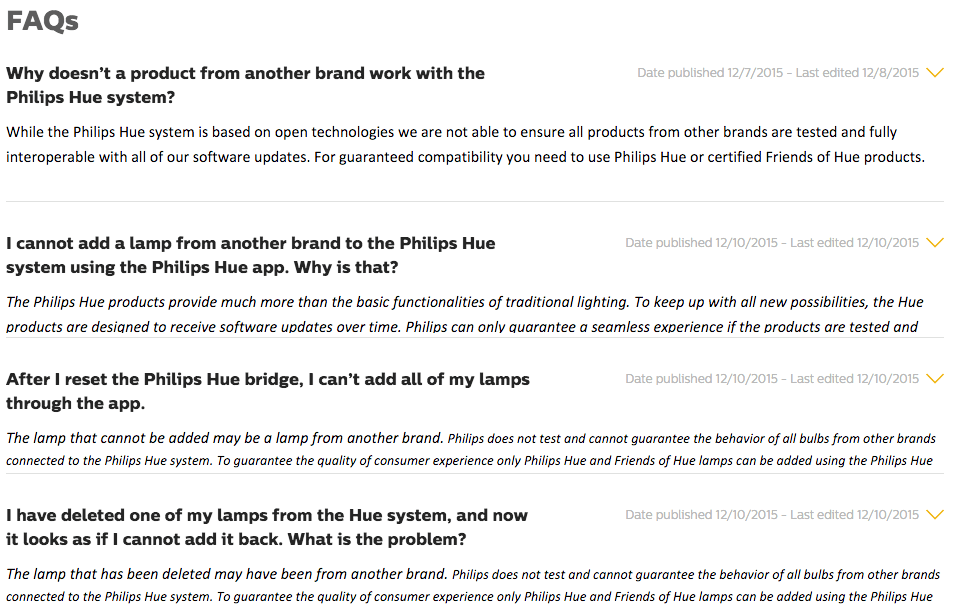 Philips Hue FAQ entries regarding 3rd party light bulbs.


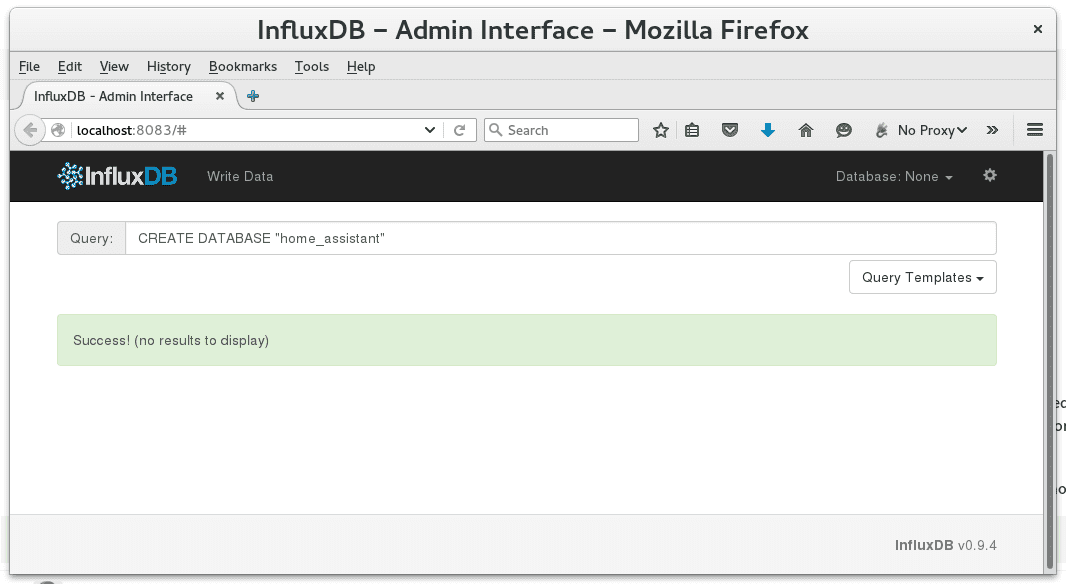 InfluxDB web frontend
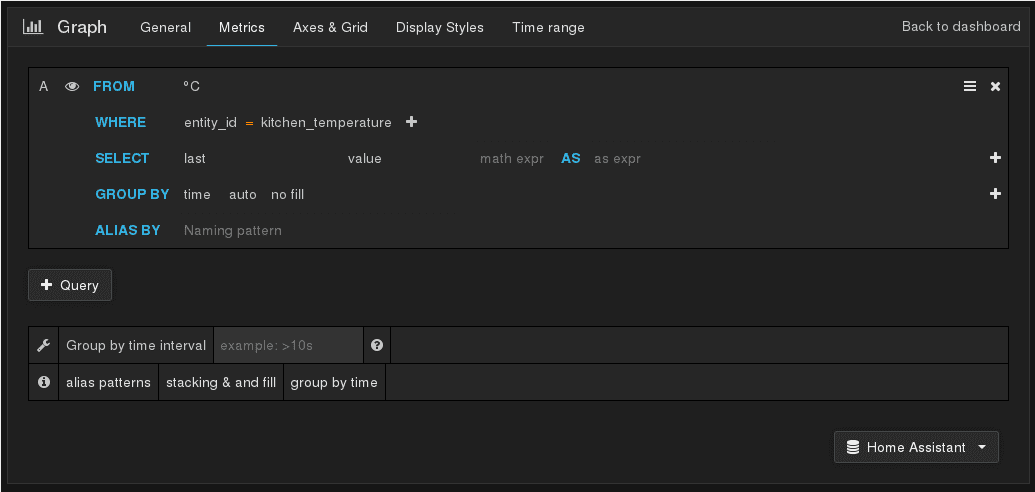 Grafana settings
 Grafana Temperature graph


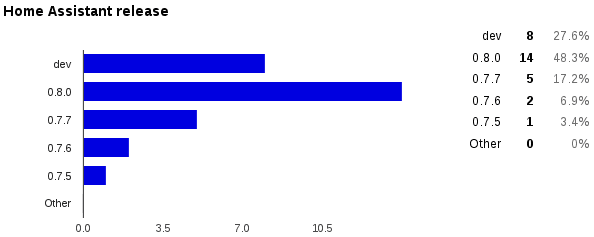 Around a week ago we started with the first survey. Now 30 people have participated. Thank you very much if you did. We think that’s enough time to have some “only partially representative” data. It’s hard to tell how many Home Assistant users are out there. Currently there are 215 members in our Gitter chat room and last week PyPI counted 5063 downloads.
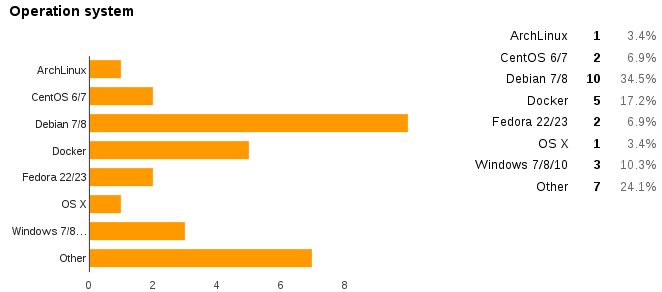 Operating systems
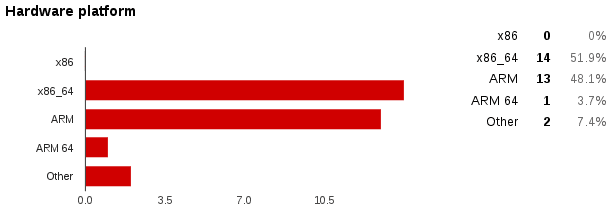 Hardware platforms
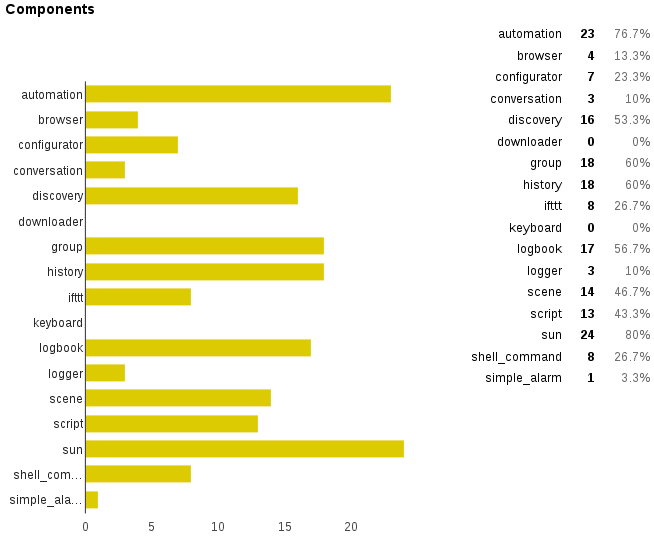 Components
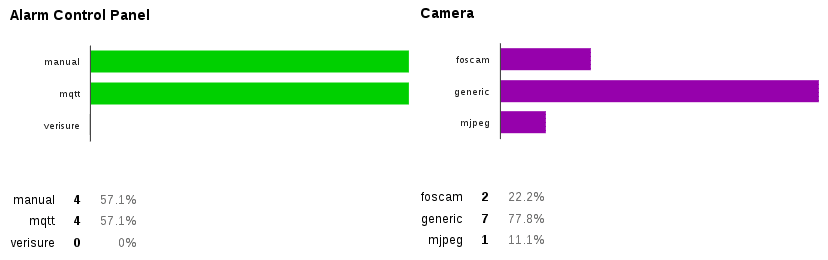 Alarm Control Panels and Cameras
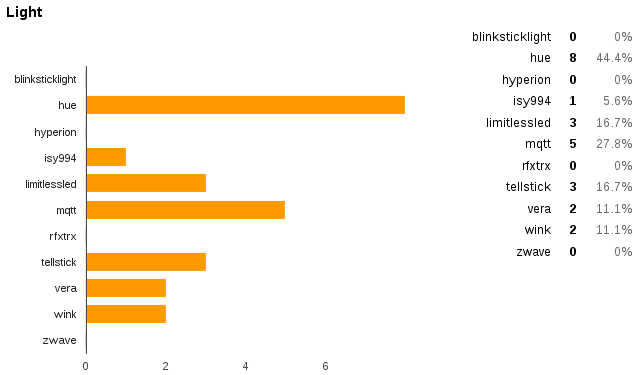 Lights
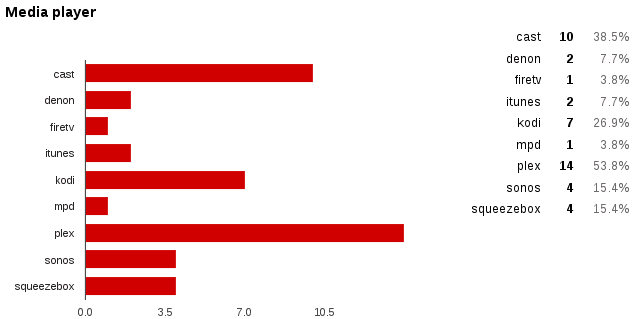 Media players
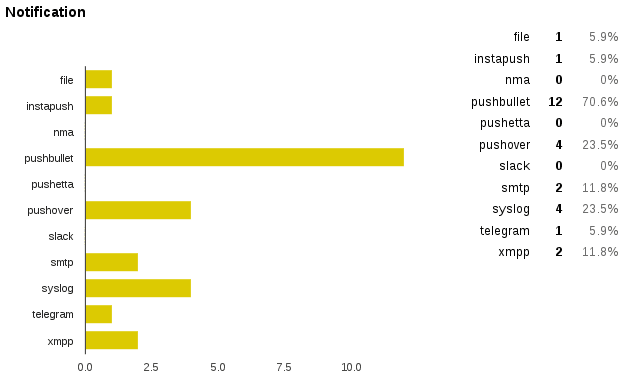 Notifications
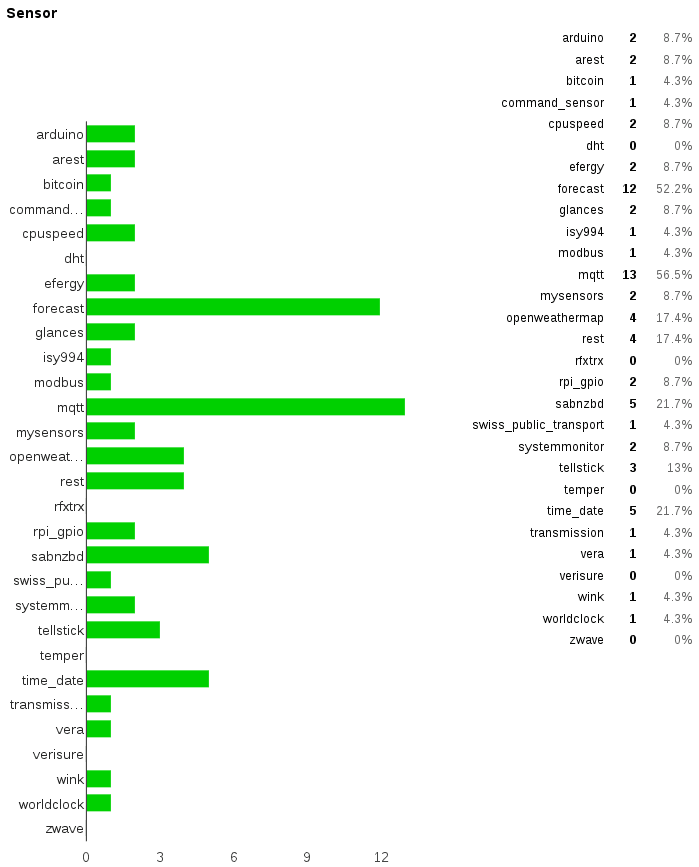 Sensors
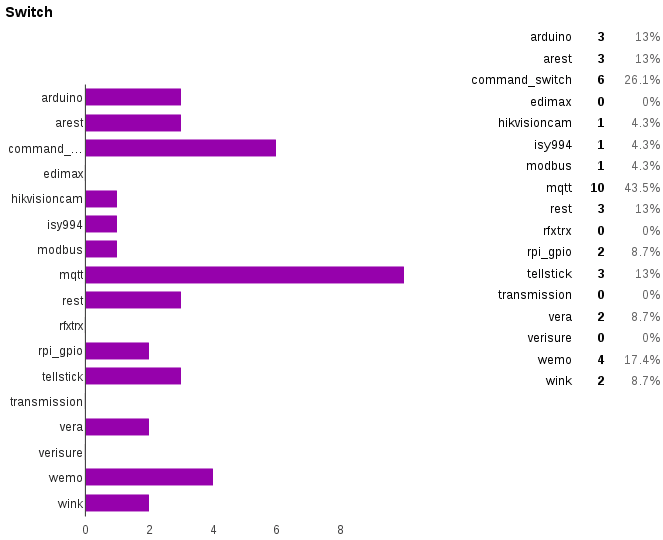 Switches
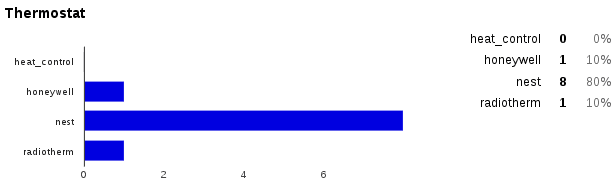 Thermostats


 Picture of the final setup (+ 2 LED for decoration)
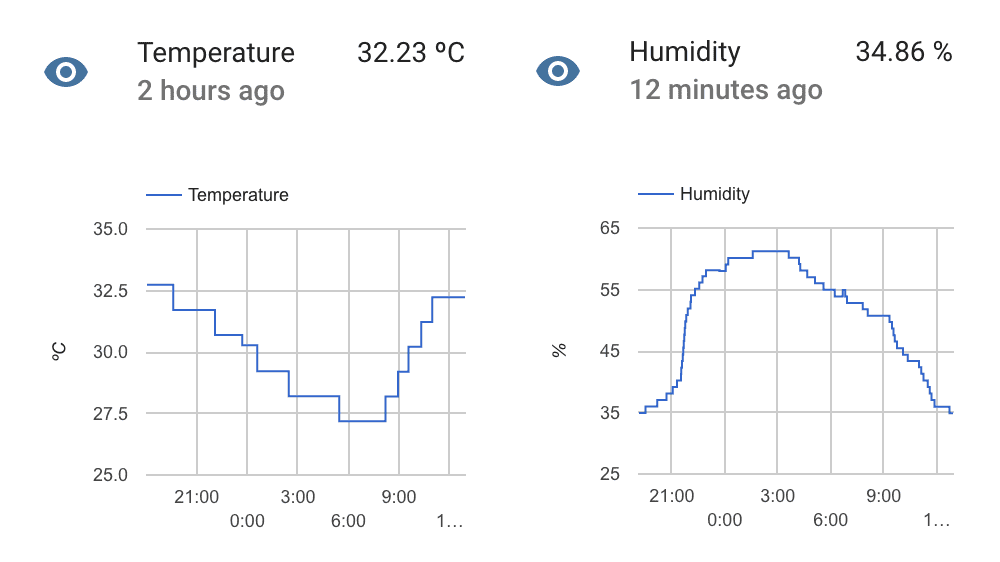 Home Assistant will keep track of historical values and allow you to integrate it into automation.


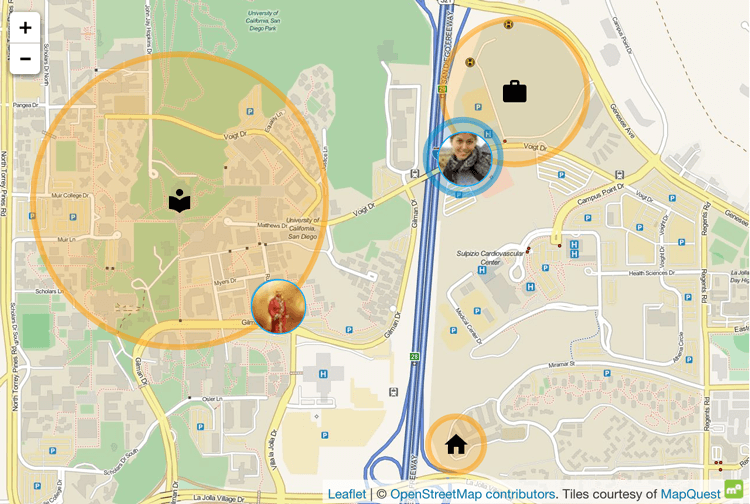 Map in Home Assistant showing two people and three zones (home, school, work)

 Sonos support has been added by
 We now support arming and disarming your verisure alarm from within Home Assistant thanks to added support by
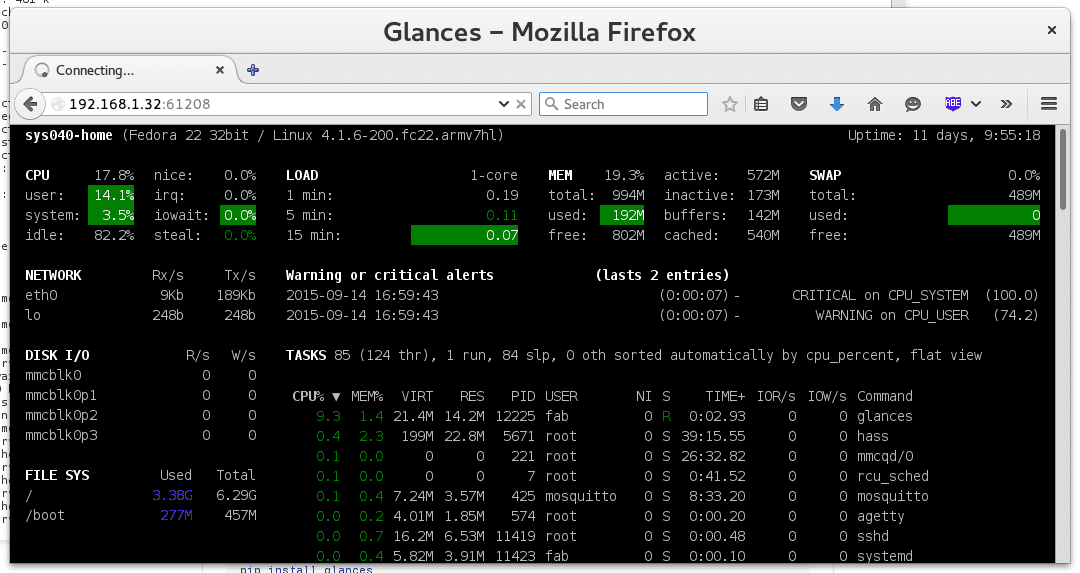 Glances web interface
 The Glances sensors


